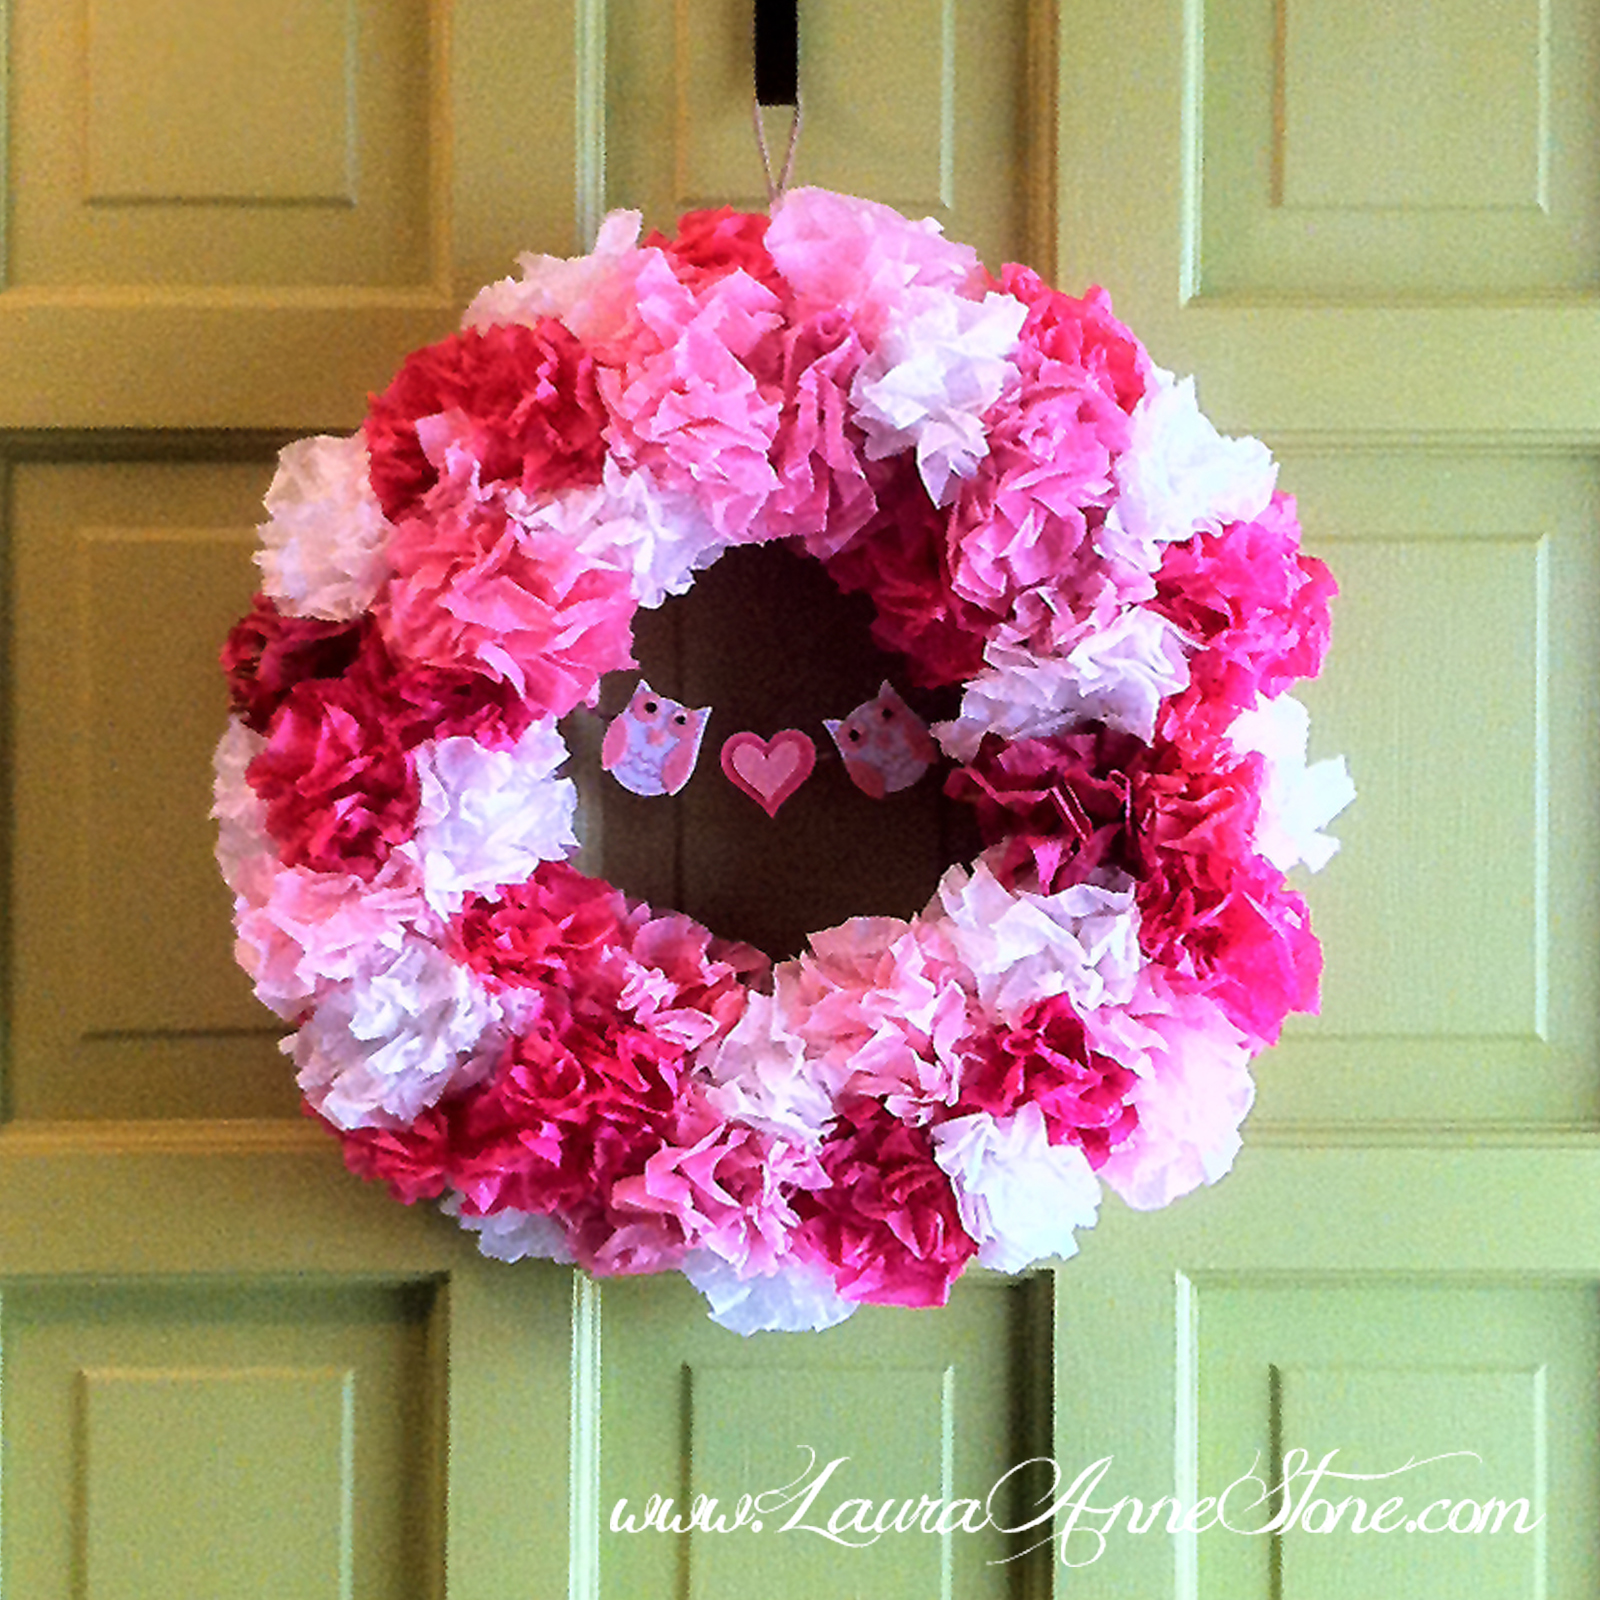
WEEKEND PROJECT: Fluffy Tissue Paper Valentine Wreath
A few weeks ago I decided to try a tissue paper wreath. It’s pretty easy and, for me, pretty cheap. I’ve been trying to use up my craft scraps and this was a good way to use up all my single sheets of pink tissue paper… plus some white… and some retail sheets that ended up in my stash. I’ve heard of people using colored napkins instead of tissue paper to make these little fluffy poufs but because I was trying to use up my scraps, I haven’t tried that method. I’m sure if you’ve got those you could use ’em up too, plus they’d probably add a nice texture.
You will need:
- Foam wreath form
- Fabric or paper strips for wrapping your wreath form
- 1-2 packets of tissue paper (I used about 40-50 poufs and each big sheet makes about 2-3 poufs, 1-2 for smaller retail store sheets)
- Stapler and staples
- Straight pins
Directions:
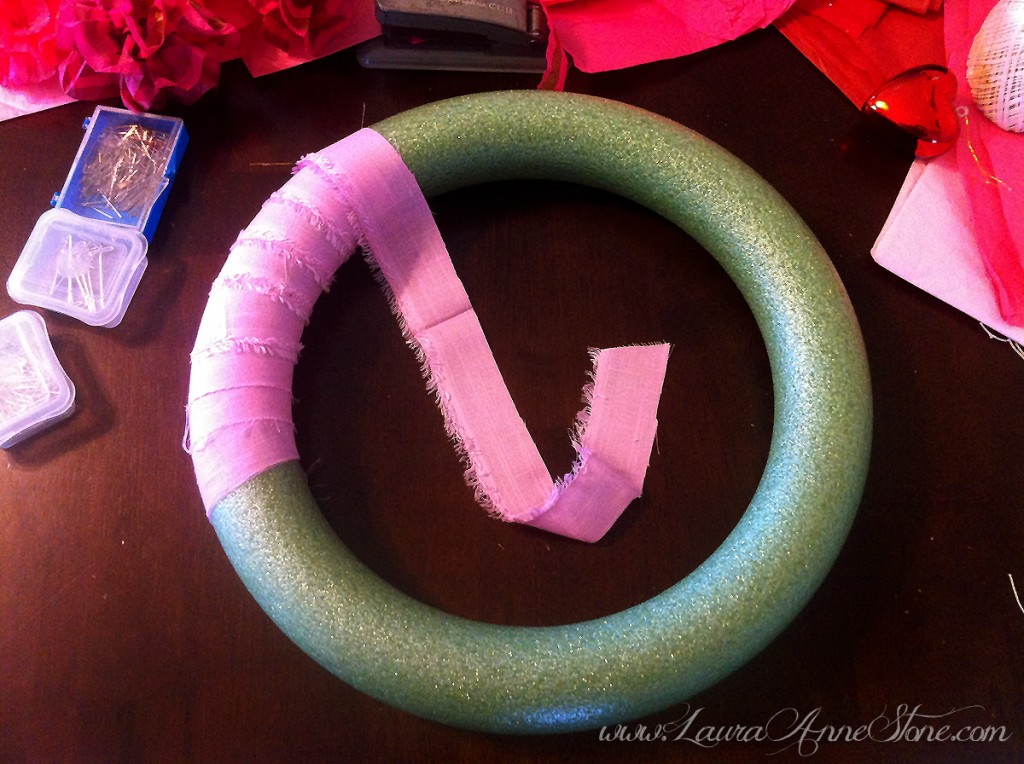
- Wrap your wreath form in your fabric or paper strips. It’s best to use a coordinating color so it won’t stand out if a little peeks through your decorations. This is always a good idea any time you’re using wreath forms, just in case.
- Cut your tissue paper into 2- to 3-inch strips and layer 3 to 4 strips together (depending on how full you want your poufs, or in my case, how low you are running on paper). Fold the strips as if you were making a fan (about 3/4-inch folds) and staple one end.
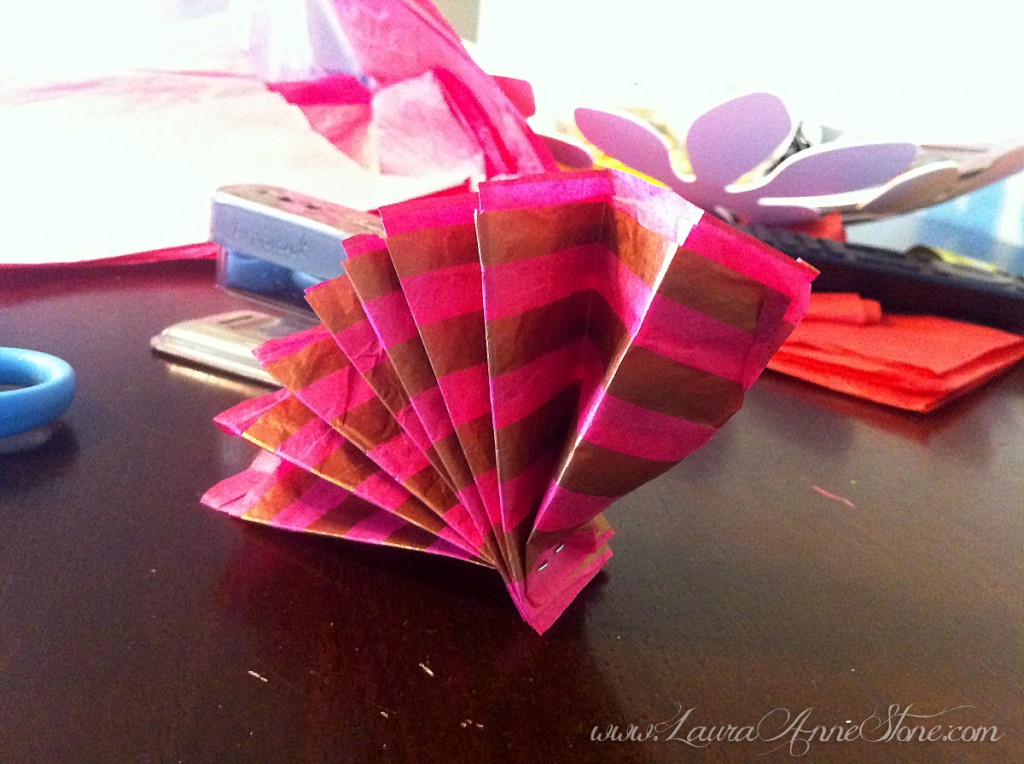
- Gently pull the individual strips apart to create a dome-shaped pouf. If you are a perfectionist, you can trim it up a little but it really isn’t necessary once you get them all together unless you cut really uneven strips. Using your straight pins, start pinning your poufs to the wreath form, continuing to fluff them out as you go so you don’t accidentally pin down any “petals”.
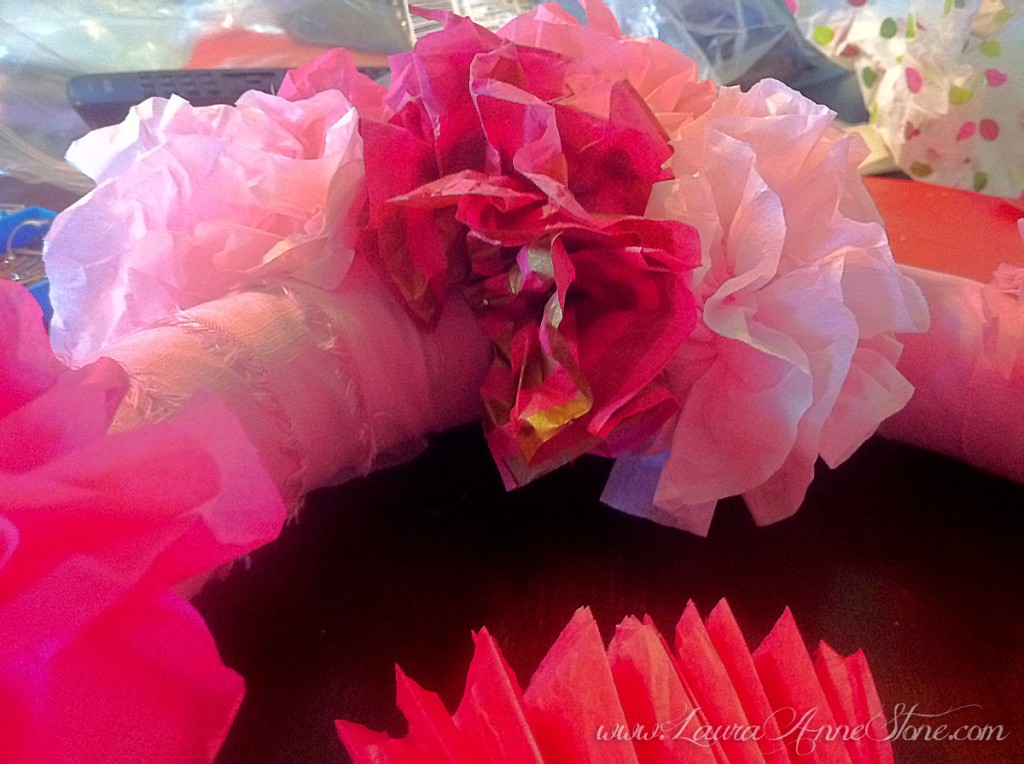 I found it was easier to make several poufs at a time and then pin them to the wreath form. This helped in two ways, first it let me alternate between folding and pinning and second it allowed me to mix and match the pouf colors.
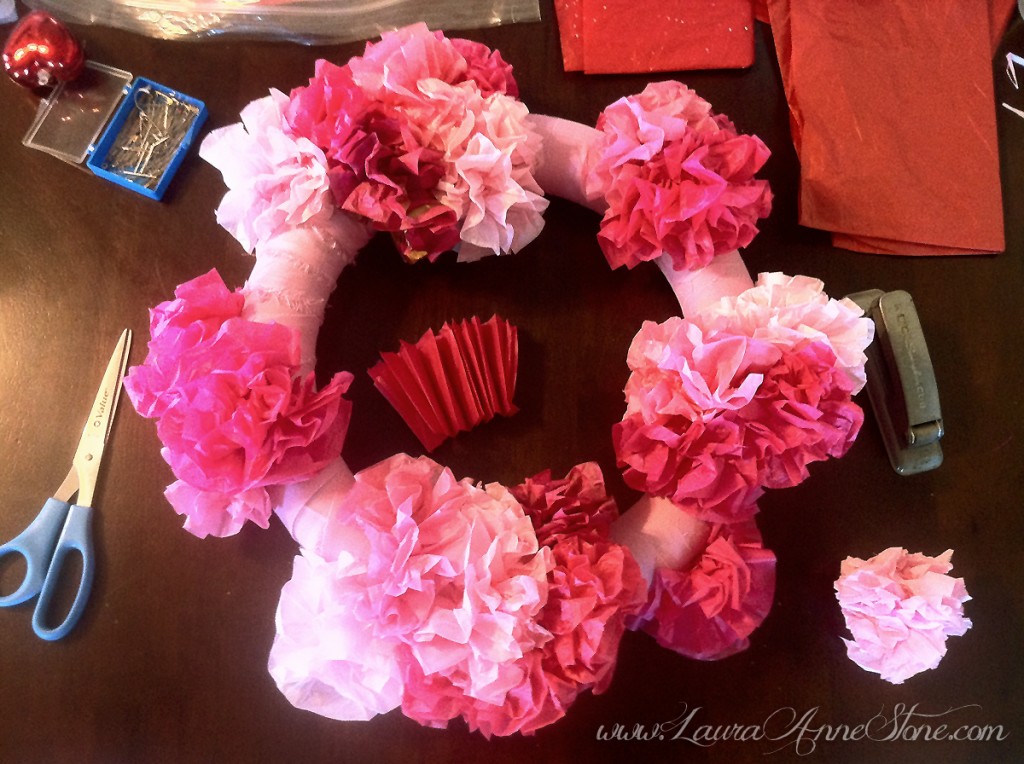 When you attach them close to the edge, try to keep the wreath form sitting flat on it’s back so it will rest flat against your wall or door.
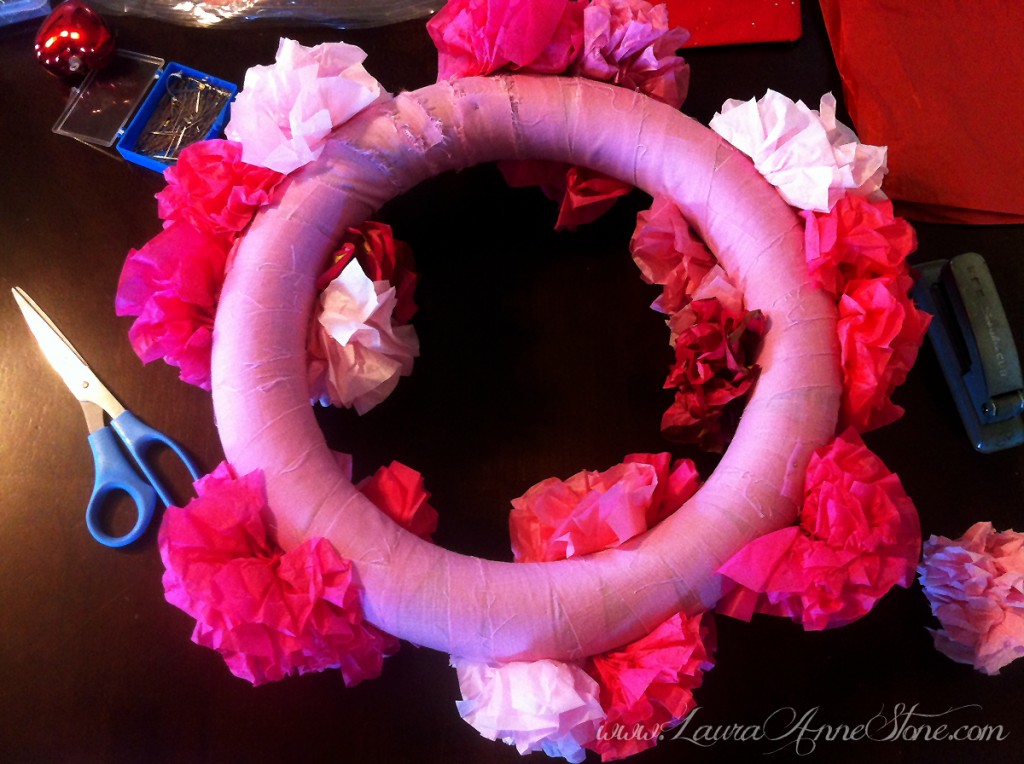
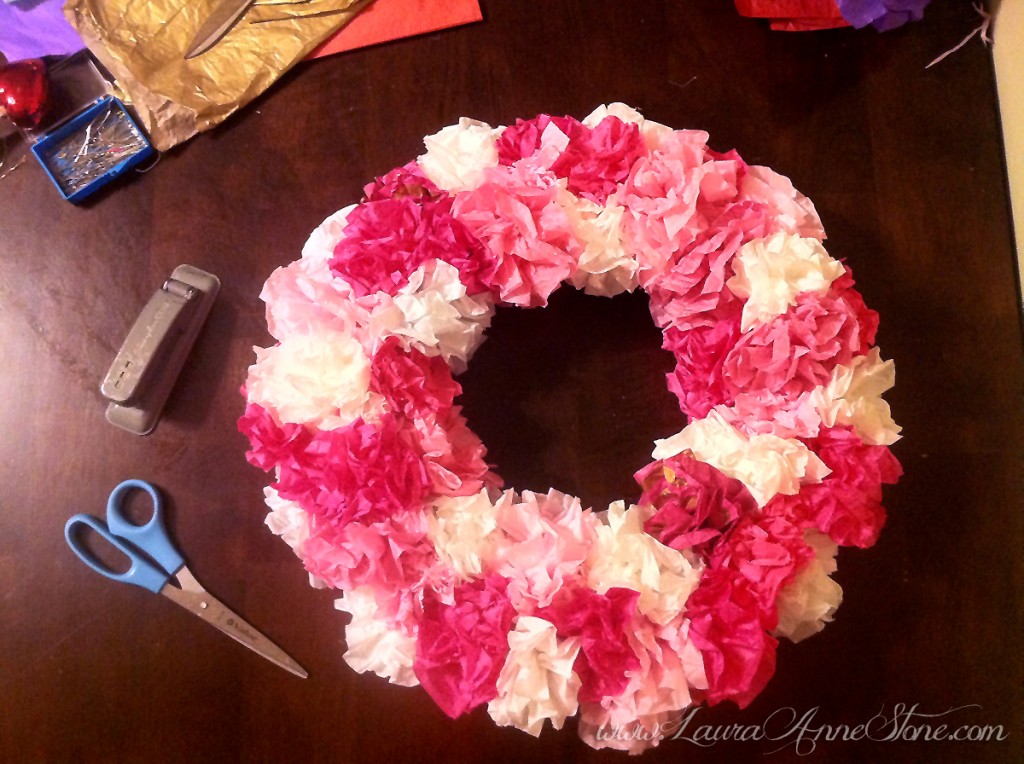
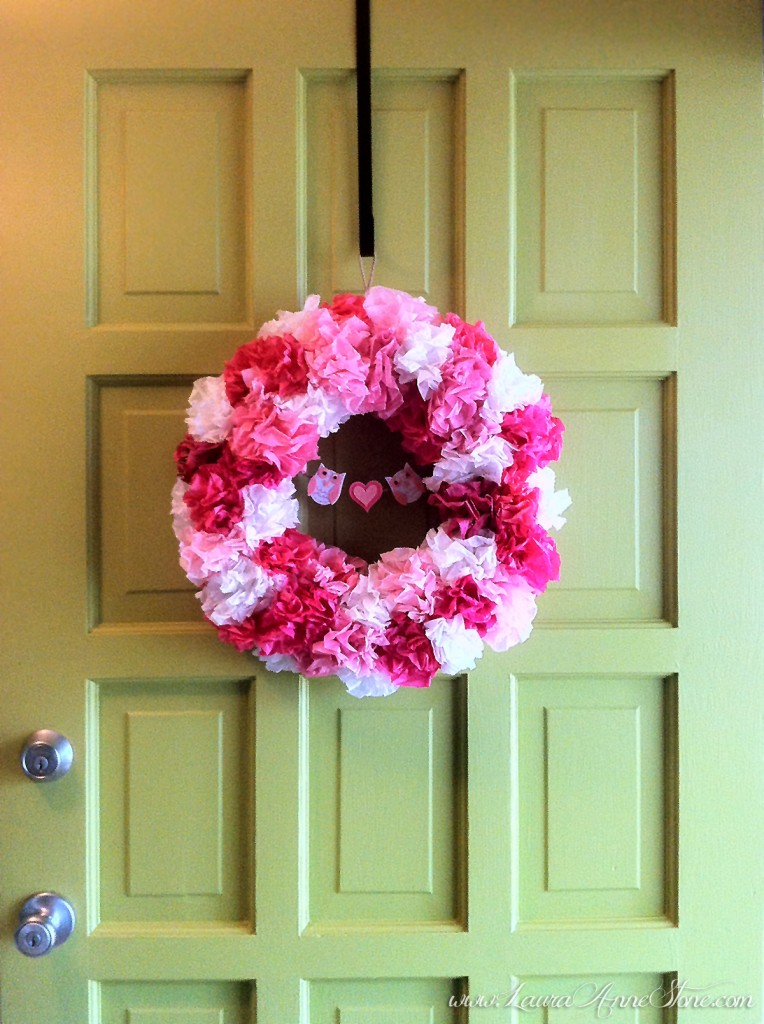
- Continue pinning and fluffing until the form is full. Gently wrap a loop either around the wreath form, re-fluffing your poufs to hide your hanger, or use a few pushpins to attach it to the back (I looped mine around the form since it’s on the door, I was afraid the pins might come loose).
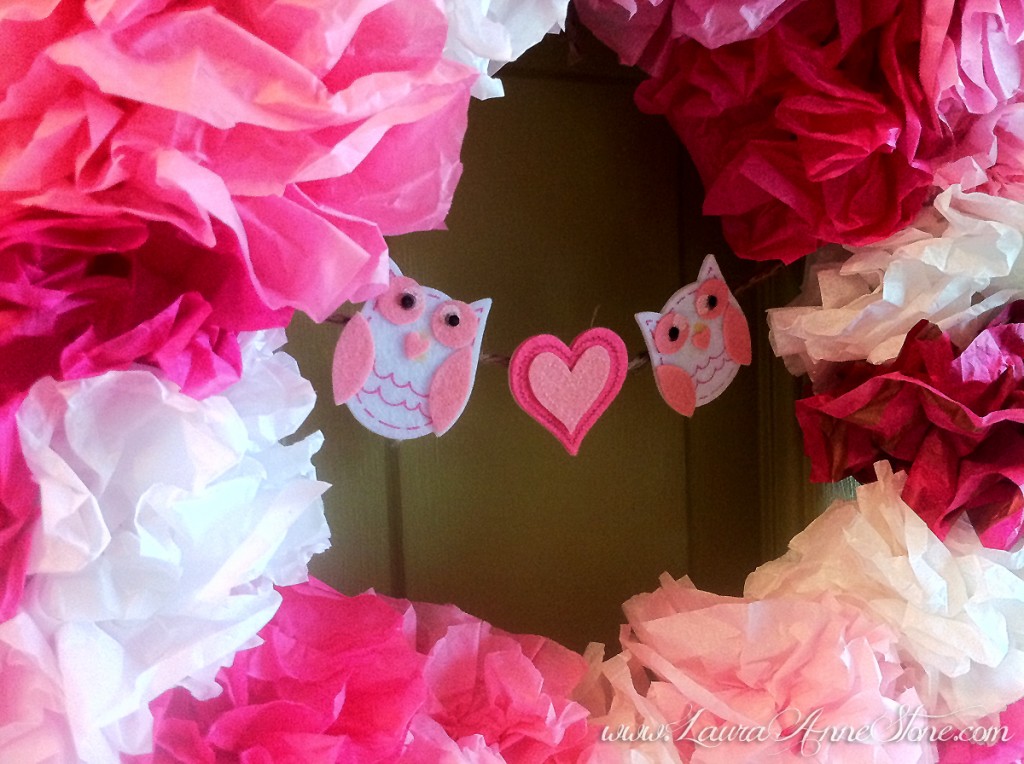
- I added a few felt owls to a piece of twine and pinned it on the back. Pennants or a single hanging ornament would also be very cute. If you can find some Valentine-related sprigs in the floral department, you could mix them in with your tissue poufs. Any way you do it, just add your establishments and you’re done!
Incidentally, this tissue paper was destined to be made into something Valentine’s Day-related… even the white sheets! Just look at the coincidental tear in one of them:
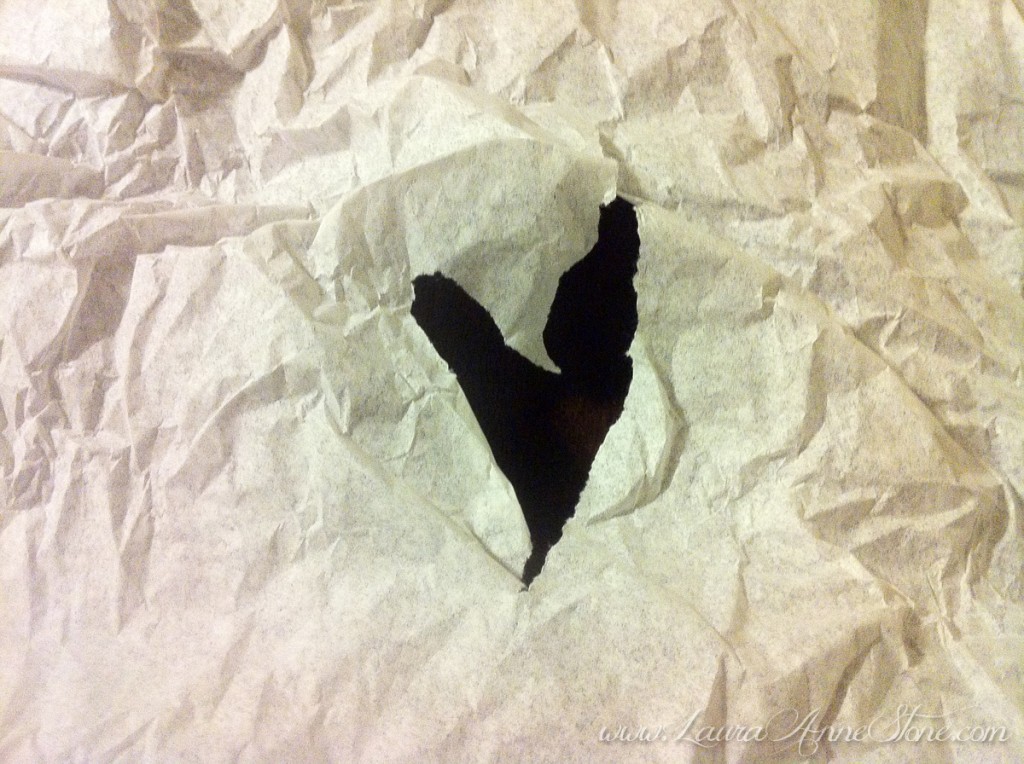
Ok… so maybe that’s a stretch. But I really did find that piece with a tear in it, and it really did get laid out just like that before I cut its less wrinkled half into strips. Honest! Anyway, happy crafting and happy Valentine’s Day!